How To Connect Brother Printer to Wifi - Check This Guide for Simple Steps
In this article we are going to explain the process to connect Brother printer to your Wifi network. Thereafter, we will explain the steps to create a wireless connection of your Brother printer with your Windows or Mac device.
In order for your Brother printer to work wirelessly, you need to put your printer and computer on same WiFi network. Hence, we will be explaining the process for this in the following section.
Before we start the process, to connect brother printer to wifi there are few things we need to check –
- First of all find out your WiFi network name.
- Also, find your network key for your WiFi (also known as “Password”).
- Write down somewhere the SSID and Password of your Wifi router as you will be needing that.
Steps to Learn How Do I Connect Brother Printer to Wifi Network
- First, turn on your WiFi router and make sure you place your printer within the WiFi network range.
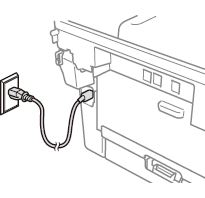
- Then, connect the power cord of Brother printer to electric socket and make turn it on.
- Next click on “Menu” button located on your Brother printer.
- Using the up and down arrow key, select the “Network” option and click on “OK” button.
- Hit on the up and down arrow key to choose “WLAN” and click on “Ok”
- Select “Setup Wizard” option by using Up and Down key and then click on “Ok” again.
- When you see the “Wifi enable”option, press “Yes” on it. Now Brother printer will automatically search for the wireless network from the available list.
- Select your WiFi network name from the list and press “Ok”.
- Next, it will ask for the WiFi password. Enter your correct password and press “Ok”.
- This will complete the process of connecting Brother printer to WiFi network.
So, above these steps to connect brother printer to wifi when you are facing the trouble not connecting to wifi use these simple steps as well.
How to Connect Brother Wireless Printer to Windows Computer
The answer to your question of “How do I connect my Brother wireless printer to Windows laptop or computer” is given as below-
- Firstly, turn on your Brother printer and connect it to your WiFi network by following the steps given in above section.
- Then, visit the website https://www.brother-usa.com to download driver for your Brother printer for your Windows computer.
- Search your Brother printer’s model and click on the “Download Driver” option as per your Windows compatibility.
- Now, driver installation will begin on your computer. Wait for it to finish.
- Click on the downloaded driver file to open it. Thereafter, finish the installation setup process by following on screen instructions.
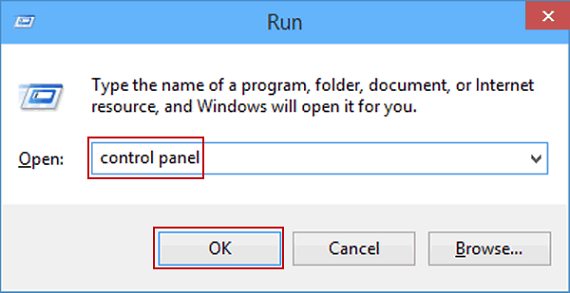
- Then, open the “Run Command” from your Windows start menu and type “Control Panel” in the dialogue box and click on “Ok”.
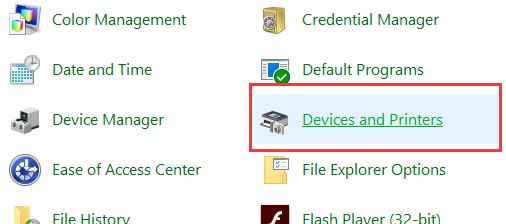
- From the control panel, select “Device and Printer” option.
- After this hit on the “Add printer” option and then select your Brother printer from the list and click on “Next”.
- Wait for a few moments to complete your setup.
- Finally, now a connection has been established between your Brother wireless printer and your Windows computer.
Connect Brother Printer On Windows Computer With USB:
If you want to connect Brother printer to Windows computer with wired connection, follow the below steps-
- First, connect your Brother printer with your Windows computer through the USB which came along with your printer.
- Then, download driver from Brother’s website and finish the installation setup process as explained in the above section
- Lastly, add your printer from control panel (same steps as mentioned above) and your Brother printer will be connected to your computer.
How to Connect Brother Wireless Printer To MAC
Go through these easy steps to connect your Brother wireless printer to MAC-
- First of all, turn on your Mac and download & install the printer driver from Brother’s website.
- Then, turn on your Brother printer and put it on same WiFi network as with your Mac (Steps mentioned in first section of this article).
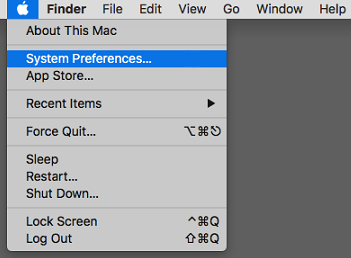
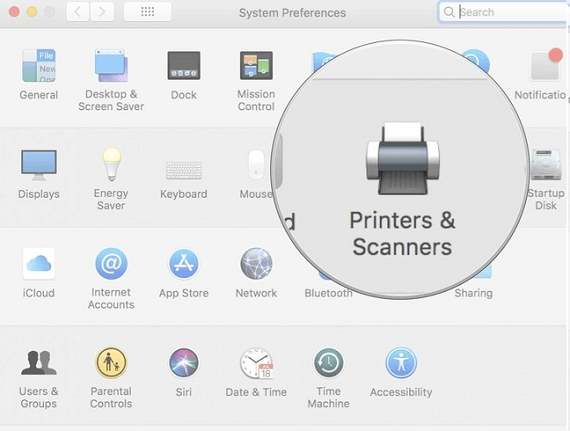
- Thereafter, open the Apple Menu and Press on the “System and Preference” option.
- Then, hit on “Printer and Scanner”.
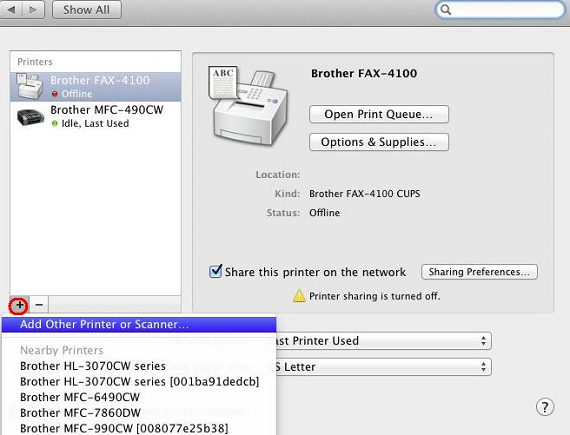
- Now, under this option you will be able to see your Brother printer with a green mark.
- Incase, if you don’t see your Brother printer, click on + sign. Now from the opened pop up window, select your Brother printer and click on “Add”.
- So by using these steps you can easily connect your Brother Wireless Printer on Mac Machine.
Conclusion:
Here, this detailed article about “How to connect Brother printer to WiFi” might be useful to fix your printer problems. By following these steps correctly, you will be able to successfully connect your printer to both Windows and Mac device. For any further help, you can reach us through chat or our toll-free number.
Tags
More posts: cannot connect brother printer to wireless network connect brother printer to computer wifi Connect Brother Printer To Wifi connect brother printer to wifi network connect brother printer to wireless network How to Connect Brother Printer To Wifi how to connect brother printer to wifi network how to connect brother printer to wifi router
Tag
- Guidelines To Setup HP Officejet Pro 4620 & 4630 Wireless Printer
- Steps to Setup HP Officejet Pro 8600 and 8610 printer to Wireless Network
More posts: cannot connect brother printer to wireless network connect brother printer to computer wifi Connect Brother Printer To Wifi connect brother printer to wifi network connect brother printer to wireless network How to Connect Brother Printer To Wifi how to connect brother printer to wifi network how to connect brother printer to wifi router


