- Home /
Access or remove background color of AssetPreview
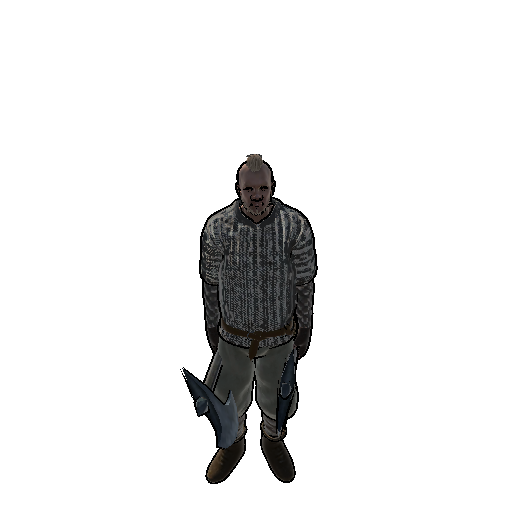
So I wanted to save time and create icons with code instead of using an image editing program. My first solution was simple, and effective, but left some images slightly damaged. The idea was to take the asset preview and make an icon out of it, but it has a background my default, so I removed the background as best as possible by doing this.
     [MenuItem("Cheats/Gen Icon")]
     public static void GenerateIcon()
     {
         Texture2D tex = AssetPreview.GetAssetPreview(Selection.activeGameObject);
         Color[] colors = tex.GetPixels();
         int i = 0;
         Color alpha = colors[i];
         Debug.Log(alpha);
         for (; i < colors.Length; i++)
         {
             if (colors[i] == alpha)
             {
                 colors[i].a = 0;
             }
         }
         tex.SetPixels(colors);
         byte[] bytes = tex.EncodeToPNG();
         // For testing purposes, also write to a file in the project folder
         System.IO.File.WriteAllBytes("Assets/" + Selection.activeGameObject.name + ".png", bytes);
         AssetDatabase.ImportAsset("Assets/" + Selection.activeGameObject.name + ".png");

     }
Again this works fine, but if any part of the object I'm creating an icon from contains the same color as background color, it gets removed. So I'm trying to figure out how to access or remove the background color of AssetPreview. If I can turn it blue or a color not shared by my objects then that would solve it. So my second attempt was to capture an editor window, but I may be doing it wrong... Here is my code.
 public class GameObjectEditorWindow : EditorWindow
 {
     GameObject gameObject;
     Editor gameObjectEditor;

     [MenuItem("Window/GameObject Editor")]
     static void ShowWindow()
     {
         GetWindow<GameObjectEditorWindow>("GameObject Editor");
     }
     Color fillColor;
     void OnGUI()
     {
         gameObject = (GameObject)EditorGUILayout.ObjectField(gameObject, typeof(GameObject), true);
         fillColor = EditorGUILayout.ColorField(fillColor);
         if (gameObject != null)
         {

             if (gameObjectEditor == null)
                 gameObjectEditor = Editor.CreateEditor(gameObject);
             GUIStyle style = new GUIStyle();
             Texture2D texture2D = Texture2D.whiteTexture;
             Color[] fillColorArray = texture2D.GetPixels();

             for (var i = 0; i < fillColorArray.Length; ++i)
             {
                 fillColorArray[i] = fillColor;
             }

             texture2D.SetPixels(fillColorArray);

             texture2D.Apply();
             style.normal.background = texture2D;
             gameObjectEditor.OnPreviewGUI(GUILayoutUtility.GetRect(512, 512), style);
             if (GUILayout.Button("Generate Texture"))
             {
                 gameObjectEditor.ReloadPreviewInstances();
                 Object[] objs = new Object[1];
                 objs[0] = gameObject;
                 Texture2D tex = new Texture2D(512, 512, TextureFormat.RGB24, false);
                 tex.ReadPixels(GUILayoutUtility.GetRect(512, 512), 256, 256);
                 Color[] colors = tex.GetPixels();
                 int i = 0;
                 Color alpha = colors[i];
                 Debug.Log(alpha);
                 for (; i < colors.Length; i++)
                 {
                     Color c = new Color(colors[i].r, colors[i].g, colors[i].b, colors[i].a);
                     if (colors[i] == alpha)
                     {
                         c.a = 0;
                     }
                     colors[i] = c;
                 }
                 tex.SetPixels(colors);
                 byte[] bytes = tex.EncodeToPNG();
                 // For testing purposes, also write to a file in the project folder
                 System.IO.File.WriteAllBytes("Assets/" + gameObject.name + ".png", bytes);
                 AssetDatabase.ImportAsset("Assets/" + gameObject.name + ".png");
             }
         }
     }
 }
Answer by RobAnthem · Mar 17, 2019 at 12:52 AM
What I was hoping to achieve using asset preview is not possible. This is my final solution. Which works great, just not what I had hoped for. You basically create a new scene, place this script in the scene, fill the Objects array with whatever prefabs you want screenshots of, and press play.
 using System.Collections;
 using System.Collections.Generic;
 using UnityEngine;
 using UnityEditor;
 public class IconCreationManager : MonoBehaviour
 {
     public GameObject[] objects;
     public string assetPath;
     private RenderTexture texture;
     private Camera camera;
     public Transform anchor;
     public float forward = 3.0f, up = 2.0f;
     public Vector2 size = new Vector2(512, 512);
     public void OnEnable()
     {
         camera = Camera.main;
         texture = new RenderTexture((int)size.x, (int)size.y, 24);
         foreach (GameObject original in objects)
         {
             GameObject go = Instantiate(original, anchor.transform.position, Quaternion.identity);
             camera.transform.position = go.transform.position + go.transform.forward * forward;
             camera.transform.position += Vector3.up * up;
             camera.transform.LookAt(go.chestTransform);
             camera.targetTexture = texture;
             camera.Render();
             Texture2D tex = new Texture2D(texture.width, texture.height, TextureFormat.ARGB32, false);
             Rect rectReadPicture = new Rect(0, 0, texture.width, texture.height);
             RenderTexture.active = texture;
             tex.ReadPixels(rectReadPicture, 0, 0);
             Color32[] colors = tex.GetPixels32();
             int i = 0;
             Color32 transparent = colors[i];
             for (; i < colors.Length; i++)
             {
                 if (colors[i].Equals(transparent))
                 {
                     colors[i] = new Color32();
                 }
             }
             tex.SetPixels32(colors);
             RenderTexture.active = null;
             string cardPath = "Assets/" + assetPath + go.name + "_icon"+ ".png";
             byte[] bytes = tex.EncodeToPNG();
             System.IO.File.WriteAllBytes(cardPath, bytes);
             AssetDatabase.ImportAsset(cardPath);
             TextureImporter ti = (TextureImporter)TextureImporter.GetAtPath(cardPath);
             ti.textureType = TextureImporterType.Sprite;
             ti.SaveAndReimport();
             DestroyImmediate(go.gameObject);
         }
     }
 }

I did find another solution that involves taking a screenshot, still similar to the render texture solution and requires play mode, but this is necessary for many of my icons.
The upside to this solution is that is renders Particle Systems with alpha mask. Very important since a lot of systems use it.
         camera.backgroundColor = TransparentColor;
         Texture2D sTex = ScreenCapture.CaptureScreenshotAsTexture(1);
         if (sTex.height < TargetSize || sTex.width < TargetSize)
         {
             Debug.LogError("Screen Resolution is too small to capture target image");
             return;
         }
         int i = 0;
         Color[] pixels = sTex.GetPixels((sTex.width - TargetSize) / 2, (sTex.height - TargetSize) / 2, TargetSize, TargetSize);
         TransparentColor = pixels[i];
         for ( i < pixels.Length; i++)
         {
             if (pixels[i] == TransparentColor)
                 pixels[i] = new Color();
         }
         Texture2D tex = new Texture2D(TargetSize, TargetSize);
         tex.SetPixels(pixels);
         string cardPath = "Assets/Resources/icons/" + "Icon_" + DelayedObj.name + ".png";
         byte[] bytes = tex.EncodeToPNG();
         System.IO.File.WriteAllBytes(cardPath, bytes);
         AssetDatabase.ImportAsset(cardPath);
         TextureImporter ti = (TextureImporter)TextureImporter.GetAtPath(cardPath);
         ti.textureType = TextureImporterType.Sprite;
         ti.SaveAndReimport();
I wrote this to extend this system for visuals I wanted icons of that required warmup time and used particle systems. This worked very effectively.
Answer by davidandrade89 · Apr 30, 2020 at 10:53 AM
I Got an error...
'GameObject' does not contain a definition for 'chestTransform' and no accessible extension method 'chestTransform' accepting a first argument of type 'GameObject' could be found (are you missing a using directive or an assembly reference?) ,What is chestTransform? 'GameObject' does not contain a definition for 'chestTransform' and no accessible extension method 'chestTransform' accepting a first argument of type 'GameObject' could be found (are you missing a using directive or an assembly reference?)
Your answer

