Parallax Occlusion mapping shader
Long time since my last question. (I haven't been slacking, in - fact iv'e even finished the programing side of the game)
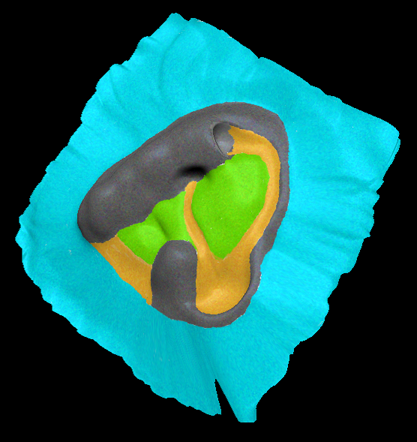
I want my Island to look, in unity, the way it looks, in Z brush. Some research iv'e done says this is possible. How?
What I'm using right now, isn't working. It looks ok, but its flat. I need the terrain to actually look the way I sculpted it.

I would like the ability to achieve 0:20 on this video: http://www.youtube.com/watch?v=gcAsJdo7dME
According to this forum its perfectly possible, i'm sorry but I just don't understand how. Why does unity ship with parallax diffuse mapping? it doesn't work. I need displacement mapping (preferably vector) any ideas on where to get that?
Thank you so much for reading, iv'e contacted unity support to see what they say.
If i understand your question, you want to create your island's hills and plains with Parallax $$anonymous$$apping. Usual PO$$anonymous$$ can not achieve the effect from the video, because it's algorithm much closer to the bumpmap, then real tesselation and it's designed, to add more detail to flat surfaces in the fragment shader. In general the geometry will remain flat, and some kind of raymarching (it varies with the implementation) does the trick, and the camera is unable to "enter inside" the fake geometry. It is possible to rewrite shader to work this way but then you will have to create new collision detection, and there are other problems too. Sorry if i misunderstood your intentions, but in this case, you should use some kind of heightmap ins$$anonymous$$d the slower parallax mapping
I have a base mesh of the Island (basic low poly shape) and I want that to have the high quality detail found on my finished sculpt.
What I'm really asking for here, is tessellation. But I could really make do with displacement/normal/texture mapping. (parallax mapping)
It seems the best way to achieve this in unity is to use the parallax occlusion map. But how do I make the shader?
I can't use a height map on a plane, because I have very detailed texturing and sculpt.
If know one knows how to program a parallax occlusion map, or if its too much work to make it for someone, for free, then tell me how I would go about getting this effect myself, with the resources available to me.
I just want the easiest possible way, in unity 3, to make a low poly mesh, have high detail and sculpt.
Unity terrain does not support other shaders than the terrain shader with plain diffuse textures.
I would recommend (as an easy approach without writing your own terrain shaders)
Create the terrain in an external tool (blender, 3DSMax, etc.)
While creating the terrain, also create a normal map (and if you really wanna spend the processing power for parallax in your game, a height map). - Blender supports sculpting and baking normal maps very good, but the other tools should too.
If the textures get to big, split up your terrain. Either in quads or eights, or in components. It will be much better if you could used tiled texture mapping instead of UV. But creating nice tiled, normal mapped textures is more complex.
Import the terrain model(s) and use the bumped or parallax shaders with your textures.
To create the assets in blender just try - "blender 2.6" sculpting and normal map baking - as search in google.
An if I may quote something I read once in a modelling book:
"You can not recreate reality. This way madness lies!"
So most times the best approach is to find a solution that looks impressive enought but is not so much work (and processing power for realtime rendering). Or find something else eyecatching! - Like some rocks on the ground or a nice sky, cool trees, or even some blue alien grass and flowers on the ground (the unity terrain would support that).
Best of Luck!
Thanks a lot for the answer captaincrunch80.
what I am doing In Z brush, currently, is this:
$$anonymous$$ake a plane. (1100 polygons)
Divide it seven times. (4 000 000 polygons)
Do the detail, sculpt and texturing.
Go to the lowest subdivision and make:
A Normal $$anonymous$$ap. (2085 x 2085)
A Texture $$anonymous$$ap. (2085 x 2085)
A Displacement $$anonymous$$ap. (2085 x 2085)
Export the base mesh, and all the textures.
Import them into unity, and use the relief map shader.
This doesn't work, look all over the web for a solution that fits my needs.
I'm not using the terrain tool in unity at all. It was a good observation and I should have made it clearer in the question, sorry I didn't.
Ah I see, ZBrush is that sculpting & model-painting tool! I have overseen that sry.
Ok then it should work.
Have you checked that the greyscale height-map is located in the alpha channel? Best would be locating it in the alpha-channel of the base diffuse map. The (A) behind the texture name in a shader means the image will be read from the alpha channel.
If zBrush does not have that export function, you can do that in photoshop (maybe also in gimp).
Here is a nice tutorial http://cgcookie.com/blender/2011/07/27/creating-a-sci-fi-panel-part-2/
at Time 26:00 and the next two $$anonymous$$utes, he explains how to create and setup that alpha channel mixed maps in photoshop and unity. (The tutorial itself is blender related, but that part should be the same)
Also make sure the normal map import settings are ok - Import Type: Normal $$anonymous$$ap. And all imported textures should be set to Wrap $$anonymous$$ode: clamped if you use UV mapping (what I think ZBrush does).
Ah I think I need to be more concrete:
I am speaking of Unity's "Parallax Diffuse" Shader now:
Create two textures:
Texure 1: Base (RGB-Channels) + Heightmap (Alpha-Channel) | Import Type: Texture, Wrap $$anonymous$$ode: clamped
Texure 2: Normal (RGB-Channels) | Import Type: Normalmap, Wrap $$anonymous$$ode: clamped
Then put them into the "Parallax Diffuse" shader
(Texure 1) -> Base (RGB)
(Texure 2) -> Normalmap
(Texure 1) -> Heightmap(A)
Hello captainCrunch80. thanks for the fast reply.
The displacement map's exported from z brush can't be read by unity so I had to bring it into photoshop any way, only to find exactly that (that they are locked into the alpha channel).
Thing is, displacement maps from z brush are automatically exported in the alpha channel, so as to be used immediately.
C4D also reads the alpha channel of a displacement map, in order to displace, And I had pre checked it worked there.
Thank you so much, for being this active.
EDIT: I just checked, they are already set to clamp.
Anytime!
$$anonymous$$aybe you can vote my answer and mark as solved? I try to build up some $$anonymous$$arma ^_^
Potential answer here...
I found something here. When I Brought it into unity, I got these:
Errors:
 Shader error in 'POM': GLSL vertex shader: ERROR: 0:289: 'o' : syntax error syntax error at line 34

 Shader error in 'POM': Shader program had errors at line 35

 Shader error in 'POM': Program 'frag', declaration of "o" conflicts with previous declaration at (83) at line 110

 Shader error in 'POM': Program 'frag', syntax error, unexpected identifier, expecting ',' or ';' at token "o" at line 110

 Shader error in 'POM': Program 'frag', type name expected at token "o" at line 110

 Shader error in 'POM': Program 'vert', declaration of "o" conflicts with previous declaration at (83) at line 110

 Shader error in 'POM': Program 'vert', syntax error, unexpected identifier, expecting ',' or ';' at token "o" at line 110

 Shader error in 'POM': Program 'vert', type name expected at token "o" at line 110
Warnings:
 Shader warning in 'POM': Program 'frag', implicit cast from "float3" to "float2" at line 246

 Shader warning in 'POM': Program 'vert', implicit cast from "float3" to "float2" at line 246
I don't know hlsl or cg. Can anyone help me to understand whats wrong here?
