Wayback Machinekoobas.hobune.stream
May JUN Jul
Previous capture 13 Next capture
2021 2022 2023
1 capture
13 Jun 22 - 13 Jun 22
sparklines
Close Help
  • Products
  • Solutions
  • Made with Unity
  • Learning
  • Support & Services
  • Community
  • Asset Store
  • Get Unity

UNITY ACCOUNT

You need a Unity Account to shop in the Online and Asset Stores, participate in the Unity Community and manage your license portfolio. Login Create account
  • Blog
  • Forums
  • Answers
  • Evangelists
  • User Groups
  • Beta Program
  • Advisory Panel

Navigation

  • Home
  • Products
  • Solutions
  • Made with Unity
  • Learning
  • Support & Services
  • Community
    • Blog
    • Forums
    • Answers
    • Evangelists
    • User Groups
    • Beta Program
    • Advisory Panel

Unity account

You need a Unity Account to shop in the Online and Asset Stores, participate in the Unity Community and manage your license portfolio. Login Create account

Language

  • Chinese
  • Spanish
  • Japanese
  • Korean
  • Portuguese
  • Ask a question
  • Spaces
    • Default
    • Help Room
    • META
    • Moderators
    • Topics
    • Questions
    • Users
    • Badges
  • Home /
avatar image
1
Question by mstath1s · Sep 23, 2013 at 03:05 PM · renderingimage-effectslinear

Banding artifacts with linear color space and color correction image effect

Hi all,

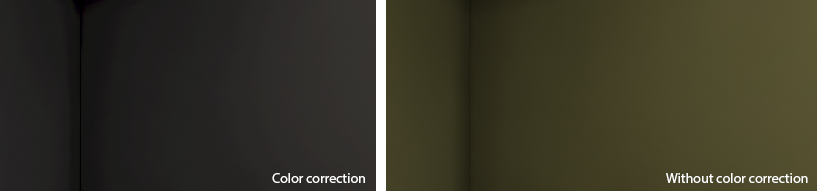
I moved to linear space lighting but I have encountered some problems with the color correction image effect. There are some banding artifacts.

In the process of finding a solution, I tried to follow the solution that it is proposed in the following thread. Image effect "Color Correction Curves" doesn't work correctly with Linear Space rendering.

The result image was too dark and the banding artifacts were still there. Therefore, I continue looking and I applied inverse gamma curve as I saw in bypass linear lighting limitation in iPad.

I modified the code of ColorCorrectionSimple.shader. Instead apply the gamma value as the first link suggests:

 half4 frag(v2f i) : COLOR
 {
    half4 color = tex2D(_MainTex, i.uv);
    return pow(color, _Gamma);
 }

I used :

     fixed4 color = tex2D(_MainTex, i.uv); 
     color = pow (color,  1/ _Gamma );

And then I modified the exposure value in the Tonemapping image effect to make it brighter.

The banding artifact was not visible anymore but now the scene looks too desaturated. What is the correct way of using Color correction with linear color space ?

Thanks in advance!

alt text

linearcolorspace.png (120.9 kB)
Comment
Add comment · Show 1
10 |3000 characters needed characters left characters exceeded
▼
  • Viewable by all users
  • Viewable by moderators
  • Viewable by moderators and the original poster
  • Advanced visibility
Viewable by all users
avatar image DarkPixel · Oct 09, 2013 at 02:24 PM 0
Share

Your screenshot is removed, you should add it directly to your post

1 Reply

· Add your reply
  • Sort: 
avatar image
0

Answer by LukaKotar · Jul 14, 2016 at 03:32 AM

Fixing most of the banding:

Look for the lines where the texture is created inside the 'ColorCorrectionCurves.cs' file, then change the texture format from TextureFormat.ARGB32 to TextureFormat.RGBAFloat:

 if (!rgbChannelTex)
     rgbChannelTex = new Texture2D (256, 4, TextureFormat.RGBAFloat, false, true);
 if (!rgbDepthChannelTex)
     rgbDepthChannelTex = new Texture2D (256, 4, TextureFormat.RGBAFloat, false, true);
 if (!zCurveTex)
     zCurveTex = new Texture2D (256, 1, TextureFormat.RGBAFloat, false, true);

Fixing the rest of the banding by improving the lookup texture's resolution:

If you still see banding, you can increase the texture resolution by replacing every 256 and 255.0f in the file with a higher number. After changing those numbers to 1024 or higher, banding seems to disappear completely. (Replace every 255 with the same number you used before, otherwise it will look weird.)

It is also worth noting that the number you use should be a power of 2 (2^x). (For example: 1024 = 2^10 (= 2*2*2*2*2*2*2*2*2*2), 256 = 2^8, etc.)

Making the image effect HDR compatible:

Basically, the texture used by the shader only covers colors between within the range of of 0.0 to 1.0, and uses the texture as a lookup. Therefore, color information above 1 and below 0 is lost.

To fix that, open 'ColorCorrectionCurvesSimple.shader' and change all of the fixed keywords with half ( fixed3 to half3 , fixed4 to half4 ), then insert the following, right under where the red/green/blue channels have been declared:

 if (color.r > 1) {
     red.r += color.r - 1;
 } else if (color.r < 0) {
     red.r += color.r;
 }
 if (color.g > 1) {
     green.g += color.g - 1;
 } else if (color.g < 0) {
     green.g += color.g;
 }
 if (color.b > 1) {
     blue.b += color.b - 1;
 } else if (color.b < 0) {
     blue.b += color.b;
 }
Comment
Add comment · Share
10 |3000 characters needed characters left characters exceeded
▼
  • Viewable by all users
  • Viewable by moderators
  • Viewable by moderators and the original poster
  • Advanced visibility
Viewable by all users

Your answer

Hint: You can notify a user about this post by typing @username

Up to 2 attachments (including images) can be used with a maximum of 524.3 kB each and 1.0 MB total.

Follow this Question

Answers Answers and Comments

17 People are following this question.

avatar image avatar image avatar image avatar image avatar image avatar image avatar image avatar image avatar image avatar image avatar image avatar image avatar image avatar image avatar image avatar image avatar image

Related Questions

Improving the look of Unique/User Planned Scenes 0 Answers

Why do my linear textures look different in the editor than in the mobile build? 0 Answers

Image effects do not work when rendering with multiple cameras 0 Answers

Camera.Render() doesn't execute OnRenderImage() 0 Answers

EXR textures with negative values in Gamma space 0 Answers


Enterprise
Social Q&A

Social
Subscribe on YouTube social-youtube Follow on LinkedIn social-linkedin Follow on Twitter social-twitter Follow on Facebook social-facebook Follow on Instagram social-instagram

Footer

  • Purchase
    • Products
    • Subscription
    • Asset Store
    • Unity Gear
    • Resellers
  • Education
    • Students
    • Educators
    • Certification
    • Learn
    • Center of Excellence
  • Download
    • Unity
    • Beta Program
  • Unity Labs
    • Labs
    • Publications
  • Resources
    • Learn platform
    • Community
    • Documentation
    • Unity QA
    • FAQ
    • Services Status
    • Connect
  • About Unity
    • About Us
    • Blog
    • Events
    • Careers
    • Contact
    • Press
    • Partners
    • Affiliates
    • Security
Copyright © 2020 Unity Technologies
  • Legal
  • Privacy Policy
  • Cookies
  • Do Not Sell My Personal Information
  • Cookies Settings
"Unity", Unity logos, and other Unity trademarks are trademarks or registered trademarks of Unity Technologies or its affiliates in the U.S. and elsewhere (more info here). Other names or brands are trademarks of their respective owners.
  • Anonymous
  • Sign in
  • Create
  • Ask a question
  • Spaces
  • Default
  • Help Room
  • META
  • Moderators
  • Explore
  • Topics
  • Questions
  • Users
  • Badges