How to draw a grid over parts of the terrain?
Hello there,
at the moment, I try to get a grid on a terrain. I read several answers on this and the basic suggestions were:
Include the grid in the texture,
use a projector,
use a directional light.
Now, I've tried all of them, giving me the following results:
Grid in texture:

Unfortunately, I could not figure out how this projector works (even after reading the corresponding tutorial). The directional light:

But now, I try to get such an grid only around the mouse. The size should be varying (from 1 square upwards). Here an example (from RTC3):

Now the final two questions: Which of the above methods is the best for drawing a whole grid? And how can I potentially draw the grid only around the cursor?
Regarding the RCT3 screenshot, you can also see the grid behind the hill. Is this possible with unity, too? (But I don't want to do very complex stuff as I am just a beginner ;) ).
Thanks in advance for any answer on this. :)
Since I'm currently using the texture method, I had the following idea: Perhaps one could paint the special grid texture only on parts of the terrain?
However, if I want to have different textures than the grass texture, I would have to build also the corresponding grid texture what is very annoying.
$$anonymous$$y suggestion would be to create a new material, and add it like you would paint on a new texture, but set the target strength to something around .3 the only issue is that the inside of the tiles may be slightly shaded.
Hope this helps! :D
Currently, I am trying the following approach:
 void paintTextureAt(int x, int z, int texture) {
         int localX = x*alphaTileSize;
         int localZ = z*alphaTileSize;
         float[,,] alphamap = terrain.terrainData.GetAlphamaps(localX, localZ, localX+alphaTileSize, localZ+alphaTileSize);

         // Traverse pixels
         for(int i=0; i<alphaTileSize; ++i) {
             for(int j=0; j<alphaTileSize; ++j) {
                 // Traverse textures
                 for(int k=0; k<alphamap.GetLength(2); ++k) {
                     // The wanted texture
                     if(k == texture) {
                         alphamap[i,j,k] = 1;
                     } else {
                         alphamap[i,j,k] = 0;
                     }
                 }
             }
         }
         terrain.terrainData.SetAlphamaps(localX, localZ, alphamap);
     }
But something seems to be wrong with the alphaTileSize. The terrain is of size 1024x1024. The alphamap of size 512x512. Now that the current texture size is 15x15 implies a tile size of 7.5x7.5 for the alphamap.
Ok, since the alpha map needs to have an integer tile size, I used 7x7 here. However, using the method above to paint the texture at square 0,0, I will get the following: 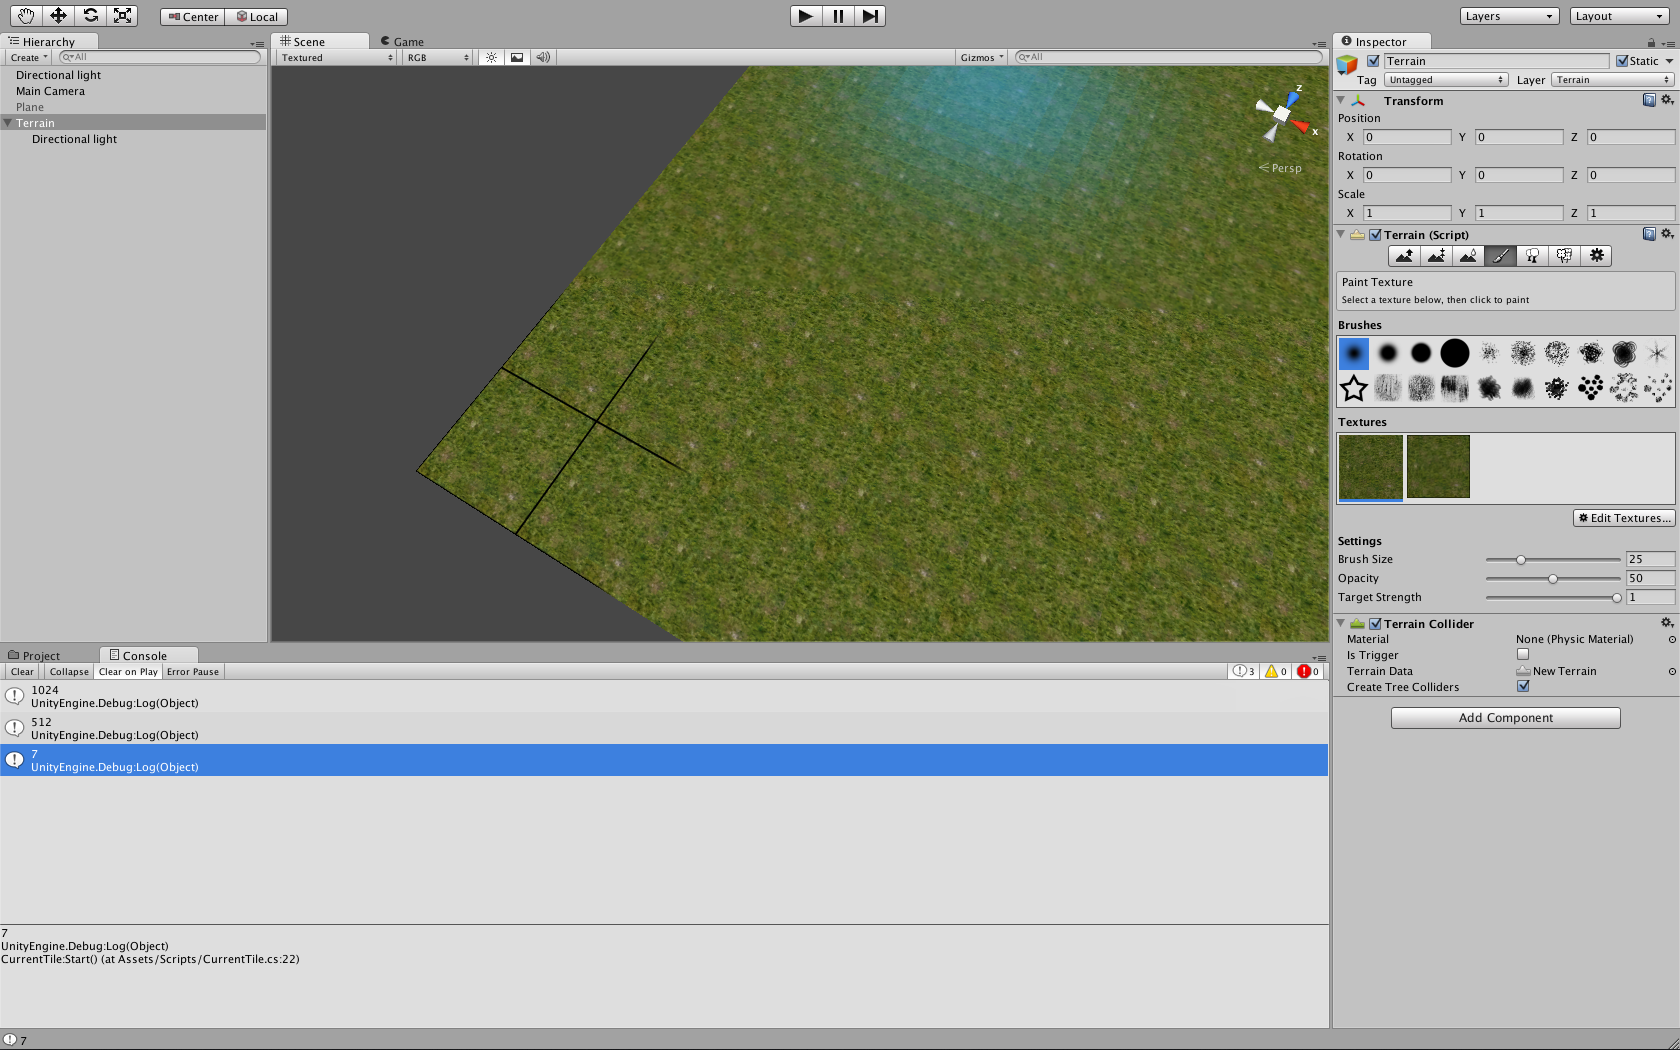
Unfortunately, thats not the expected result and I don't know how to change it. Any idea? Perhaps this approach isn't that good, too?
Also I got the projector solution working. But it looks very much the same as the directional light and I cannot limit the radius or something.
But I think it should be somehow possible to only project 1 tile on the terrain so that it is only a matter of placing my projector.
It's a shame you havn't had more input to this question, I think it is a really good question (wish I had an answer for you). I have upvoted this question.
If you have something that is sort of working for you, then use that for the moment, but I really suggest you move this to a comment and leave it unanswered, in the hope that one day someone going through the unanswered questions can provide a better solution.
All I can suggest is try a spotlight with a light cookie :
Edit : that spotlight suggestion was really bad, sorry. A projector would be much better.
I really liked this question, and was surprised there was no answer, so I decided to have a go myself.
This only answers the second half of the question how can I potentially draw the grid only around the cursor. I had a laugh at I don't want to do very complex stuff as I am just a beginner then reading your modification of the alphamap script, I wouldn't have a clue on modifying the splat/texture information!
So, this is for drawing a grid only around the mouse position. What I have done is created a mesh, then from a raycast from the camera to the terrain, reading the heightmap information, then modifying the mesh vertices based on the heights around the ray hit position. I have included some clampsing to make sure there are no array out of range problems.
Note : When I wrote this, the terrain and the object I attached the script to were positioned at (0,0,0)
indicatorSize changes the size of the grid. The grid is just a texture so it doesn't add more squares (it's possible with some modification to the uv calculations). indicatorOffsetY is to raise the mesh from the terrain, for some reason converting the height from terrain size to heightmap size and back again messes the actual height value. And further away from the terrain, there is some z-axis fighting. This could probably be fixed by adding more vertices to the mesh.
Unfortunately this is in uJS, but at least shows a proof-of-concept. If this is what you were after, I could try a conversion. If not, I'll just delete this answer =]
This was a lot of fun, I really like a challenge, and playing around with meshes and terrain data.
Here's the script :
 // ===========================================================================
 //   Plane Mesh that Forms to the Terrain Profile script
 //   written by Alucard J ( Jay Kay )
 //   April 2013
 // ===========================================================================

 #pragma strict
 @script RequireComponent( MeshFilter )
 @script RequireComponent( MeshRenderer )

 // --------------------------------------------------------------------------- Terrain Data

 public var terrain : Terrain;
 private var terrainData : TerrainData;
 private var terrainSize : Vector3;
 private var heightmapWidth : int;
 private var heightmapHeight : int;
 private var heightmapData : float[,];


 function GetTerrainData()
 {
     if ( !terrain )
     {
         terrain = Terrain.activeTerrain;
     }

     terrainData = terrain.terrainData;

     terrainSize = terrain.terrainData.size;

     heightmapWidth = terrain.terrainData.heightmapWidth;
     heightmapHeight = terrain.terrainData.heightmapHeight;

     heightmapData = terrainData.GetHeights( 0, 0, heightmapWidth, heightmapHeight );
 }


 // --------------------------------------------------------------------------- Raycast To Terrain

 private var rayHitPoint : Vector3;
 private var heightmapPos : Vector3;


 function Start()
 {
     GetTerrainData();
     ConstructMesh();
 }


 function Update()
 {
     // raycast to the terrain
     RaycastToTerrain();

     // find the heightmap position of that hit
     GetHeightmapPosition();

     // Calculate Grid
     CalculateGrid();

     // Update Mesh
     UpdateMesh();
 }


 function RaycastToTerrain()
 {
     var hit : RaycastHit;
     var rayPos : Ray = Camera.main.ScreenPointToRay( Input.mousePosition );

     if ( Physics.Raycast( rayPos, hit, Mathf.Infinity ) ) // also consider a layermask to just the terrain layer
     {
         Debug.DrawLine( Camera.main.transform.position, hit.point, Color.red );
         rayHitPoint = hit.point;
     }
 }


 function GetHeightmapPosition()
 {
     // find the heightmap position of that hit
     heightmapPos.x = ( rayHitPoint.x / terrainSize.x ) * parseFloat( heightmapWidth );
     heightmapPos.z = ( rayHitPoint.z / terrainSize.z ) * parseFloat( heightmapHeight );

     // convert to integer
     heightmapPos.x = Mathf.Round( heightmapPos.x );
     heightmapPos.z = Mathf.Round( heightmapPos.z );

     // clamp to heightmap dimensions to avoid errors
     heightmapPos.x = Mathf.Clamp( heightmapPos.x, 0, heightmapWidth - 1 );
     heightmapPos.z = Mathf.Clamp( heightmapPos.z, 0, heightmapHeight - 1 );
 }


 // --------------------------------------------------------------------------- Calculate Grid

 private var mapGrid : Vector3[,] = new Vector3[ 9, 9 ];

 public var indicatorSize : float = 1.0;
 public var indicatorOffsetY : float = 5.0;


 function CalculateGrid()
 {
     for ( var z : int = -4; z < 5; z ++ )
     {
         for ( var x : int = -4; x < 5; x ++ )
         {
             var calcVector : Vector3;

             calcVector.x = heightmapPos.x + ( x * indicatorSize );
             calcVector.x /= parseFloat( heightmapWidth );
             calcVector.x *= terrainSize.x;

             var calcPosX : float = heightmapPos.x + ( x * indicatorSize );
             calcPosX = Mathf.Clamp( calcPosX, 0, heightmapWidth - 1 );

             var calcPosZ : float = heightmapPos.z + ( z * indicatorSize );
             calcPosZ = Mathf.Clamp( calcPosZ, 0, heightmapHeight - 1 );

             calcVector.y = heightmapData[ calcPosZ, calcPosX ] * terrainSize.y; // heightmapData is Y,X ; not X,Y (reversed)
             calcVector.y += indicatorOffsetY; // raise slightly above terrain

             calcVector.z = heightmapPos.z + ( z * indicatorSize );
             calcVector.z /= parseFloat( heightmapHeight );
             calcVector.z *= terrainSize.z;

             mapGrid[ x + 4, z + 4 ] = calcVector;
         }
     }
 }


 // --------------------------------------------------------------------------- INDICATOR MESH

 private var mesh : Mesh;

 private var verts : Vector3[];
 private var uvs : Vector2[];
 private var tris : int[];


 function ConstructMesh()
 {
     if ( !mesh )
     {
         mesh = new Mesh();
         GetComponent(MeshFilter).mesh = mesh;
         mesh.name = gameObject.name + "Mesh";
     }

     mesh.Clear();

     verts = new Vector3[9 * 9];
     uvs = new Vector2[9 * 9];
     tris = new int[ 8 * 2 * 8 * 3];

     var uvStep : float = 1.0 / 8.0;

     var index : int = 0;
     var triIndex : int = 0;

     for ( var z : int = 0; z < 9; z ++ )
     {
         for ( var x : int = 0; x < 9; x ++ )
         {
             verts[ index ] = new Vector3( x, 0, z );
             uvs[ index ] = new Vector2( parseFloat(x) * uvStep, parseFloat(z) * uvStep );

             if ( x < 8 && z < 8 )
             {
                 tris[ triIndex + 0 ] = index + 0;
                 tris[ triIndex + 1 ] = index + 9;
                 tris[ triIndex + 2 ] = index + 1;

                 tris[ triIndex + 3 ] = index + 1;
                 tris[ triIndex + 4 ] = index + 9;
                 tris[ triIndex + 5 ] = index + 10;

                 triIndex += 6;
             }

             index ++;
         }
     }


     // - Build Mesh -
     mesh.vertices = verts;
     mesh.uv = uvs;
     mesh.triangles = tris;

     mesh.RecalculateBounds();
     mesh.RecalculateNormals();
 }


 function UpdateMesh()
 {
     var index : int = 0;

     for ( var z : int = 0; z < 9; z ++ )
     {
         for ( var x : int = 0; x < 9; x ++ )
         {
             verts[ index ] = mapGrid[ x, z ];

             index ++;
         }
     }

     // assign to mesh
     mesh.vertices = verts;

     mesh.RecalculateBounds();
     mesh.RecalculateNormals();
 }


 // ---------------------------------------------------------------------------
Thank you very much. :)
I had a laugh at I don't want to do very complex stuff as I am just a beginner then reading your modification of the alphamap script, I wouldn't have a clue on modifying the splat/texture information!
To be true, I don't have any Unity experience (so this was my first contact with the program), but I have a little experience in how this texture stuff works and a lot of experience in program$$anonymous$$g. ;)
Your demo looks awesome. I also had the idea to use a plane and move it over the terrain, but it worked only for flat terrains. I will have a closer look at how you implemented it tomorrow, but this is what I was looking for. :)
Oh, you don't have to do a conversion. I'll try it tomorrow. You've helped already enough. ;)
Of course, I will post my results here.
No worries, was alot of fun =]
$$anonymous$$ost of it is just declaring functions and variables correctly for C#. I'm not familiar with GetComponent or mesh stuff, but a quick look at the Scripting Reference would clear that up. So if there are any problems, let me know.
Here is the Unity Scripting Reference on $$anonymous$$esh : http://docs.unity3d.com/Documentation/ScriptReference/$$anonymous$$esh.html
And the procedural example : http://u3d.as/content/unity-technologies/procedural-examples/3zu
It works!
Here is the translated C# script: http://pastebin.com/$$anonymous$$ffepxzJ
Excuse my ignorance, but when I run the above script against my terrain, I see a pink box around the mouse where I would expect the grid. I added a mesh filter and a mesh renderer to the terrain, but left the settings for those at default. If I change the material in the mesh renderer, the pink box will change to match the material I selected. I'm sure I am missing something obvious since I am new to both unity and 3d.
How about writing a simple shader that gets the cursor position as a property, then draws a grid around it based on some rules - such as, if the world coordinate at that pixel is a whole number or not, or divisible by some number defining the scale, and so on, depending on how large and in what shape you want your grid. You could either take into account or ignore the shape of the terrain, as you please (vertex shaders).
This way you could add all kinds of pretty effects too, such as soft fading out of the grid based on distance from the cursor, "glow" effects, variable coloring and so on. And using shaders would probably be among the cheapest ways of doing something like this, at least if you keep it simple :)
EDIT:
I need a grid myself, so I went ahead and tested this idea in practice. So here's a Cg grid shader, based on this excellent Wikibook by Martin Kraus: http://en.wikibooks.org/wiki/Cg_Programming/Unity
Attach the shader to a new Material, then attach that Material to a Plane object (or whatever, really). You'll get adjustable parameters (grid cell size, line thickness, line color and the color of the "outside" bits) in the Material properties. Note that I made the grid for the X and Y plane, you can change this to X and Z for example for the default Unity plane position, or whatever you need.
It's pretty lightweight, I'm on a laptop with no discrete graphics device and I don't notice any impact on rendering time. If you want to make the grid follow the cursor, just add a property for cursor position and update it through a script (and remember to use renderer.sharedMaterial instead of just renderer.material). For more info, take a look at the Shader Properties section on this page, it pretty much directly tells how to do this: http://en.wikibooks.org/wiki/Cg_Programming/Unity/Shading_in_World_Space
 Shader "Grid" {

    Properties {
       _GridThickness ("Grid Thickness", Float) = 0.02
       _GridSpacing ("Grid Spacing", Float) = 10.0
       _GridColor ("Grid Color", Color) = (0.5, 0.5, 1.0, 1.0)
       _OutsideColor ("Color Outside Grid", Color) = (0.0, 0.0, 0.0, 0.0)
    }

    SubShader {
       Tags {
          "Queue" = "Transparent"
             // draw after all opaque geometry has been drawn
       }

       Pass {
          ZWrite Off
             // don't write to depth buffer in order not to occlude other objects
          Blend SrcAlpha OneMinusSrcAlpha
             // use alpha blending

          CGPROGRAM

          #pragma vertex vert
          #pragma fragment frag

          uniform float _GridThickness;
          uniform float _GridSpacing;
          uniform float4 _GridColor;
          uniform float4 _OutsideColor;

          struct vertexInput {
             float4 vertex : POSITION;
          };
          struct vertexOutput {
             float4 pos : SV_POSITION;
             float4 worldPos : TEXCOORD0;
          };

          vertexOutput vert(vertexInput input) {
             vertexOutput output;

             output.pos =  mul(UNITY_MATRIX_MVP, input.vertex);
             output.worldPos = mul(_Object2World, input.vertex);
                // transformation of input.vertex from object coordinates to world coordinates;
             return output;
          }

          float4 frag(vertexOutput input) : COLOR {
             if (frac(input.worldPos.x/_GridSpacing) < _GridThickness
             || frac(input.worldPos.y/_GridSpacing) < _GridThickness) {
                return _GridColor;
             } else {
                return _OutsideColor;
             }
          }

          ENDCG
       }
    }
 }
Thank you so much! I spent hours making something similar to this and then I found your post. This is exactly what I'm looking for, thank you again!
An alternative solution is to have a series of gameobjects set apart from one another as if to mimic the intersections of your grid and put these into a prefab.
Following this after you cast a ray onto your terrain update the position of this prefab to be above the hitPoint by an arbitrary distance. (With a more fancy system you could get it to snap over your grid if you wanted).
Following this cast a ray directly downwards from each gamOject in the prefab and use variables / an array to store the vector3 information about where they hit (use layermasks as necessary to make sure you only hit the terrain).
Finally draw a lineRenderer with an appropriately thick line between these points.
If you are concerned about Bezier slopes on your terrain, then simply add more gameobjects to your prefab to 'fake' any curvature issues.
This mthod will allow you to not only use a square based grid system, but also a hexagonal / triangular one, which can be very handy.
Hope that all makes sense in theory.
http://rene.klacan.sk/unity3d/games/2015/01/23/draw-grid-on-the-terrain-in-unity/ one of the possible solutions without using projectors or shaders
