ProBuilder Element Snap to Grid (Unity 2020.1.2f1)
When creating objects in ProBuilder, how can I snap elements (vertices, edges, faces) to the grid? I have installed ProBuilder, but not ProGrids, since I believe ProGrids is incorporated in Unity built-in grids.
I am working through Brackey's tutorial on creating a level with probuilder. At 6:49, he talks about snapping edges in as "simple." He is using ProGrids. Snapping elements to grid seems like an essential functionality, but I can't get it to work with the default system. I see the toggle for snap-to-grid, and while it works for probuilder objects, it is greyed out when selecting elements.
I see a warning that installing ProGrids with build 2020.1 may cause problems, so I have not tried installing it. Any advice would be much appreciated.
Answer by MootNapkin · Mar 23, 2021 at 08:03 PM
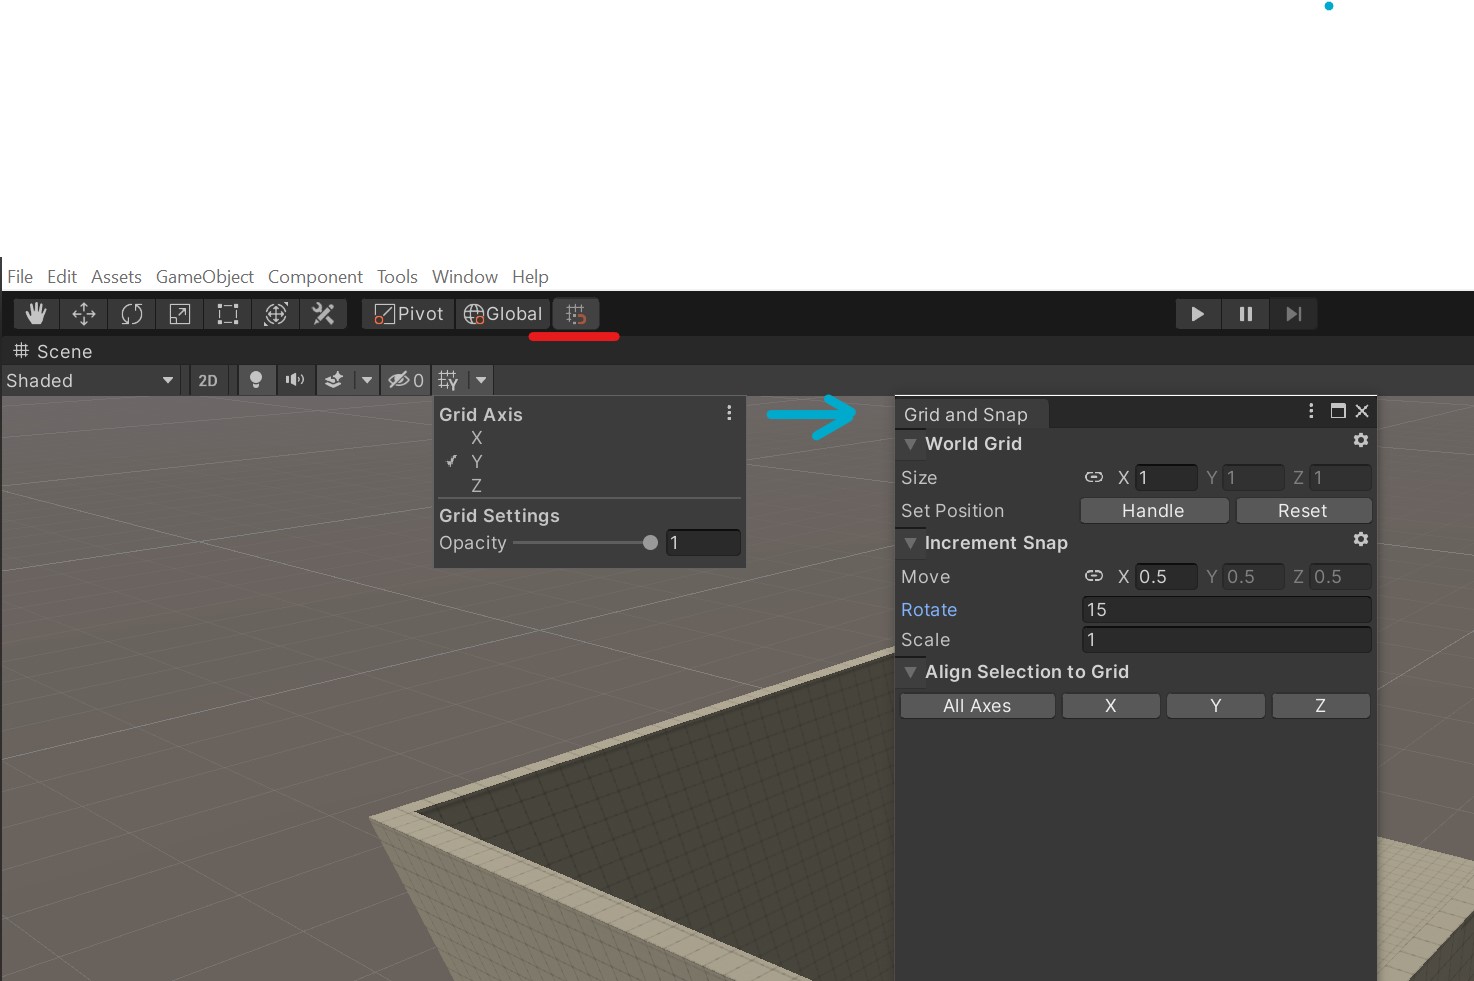
I know this is a bit old, but I was just looking for and found the same question/answer, so I thought I'd share it. I'm going to define an element as a ProBuilder edge/face/vert. Pic below for reference.
The ProGrids system was integrated into Unity at some point in 2019/2020, so you don't need any other packages.
To enable Grid Snapping, click the Grid/Magnet button (underlined Red). This will automatically snap anything, including elements, to the grid world size when you next move that object/element. The button is greyed out when you've selected an element, but it's still enabled if you toggle it before selecting an element.
To display the grid, glick the Grid/Y button in your scene window. Click the dropdown -> Triple dot for grid size options.
If you disable GridSnapping, you can move/rotate/scale at whatever your Increment Snap settings are by holding CTRL.
As far as I can tell, Align Selection to Grid only works for Objects, NOT elements. But you can enable GridSnapping and it'll align any element you move.
 ][1]
][1]
Your answer

