Correcting normals along chunk edges
I have chunked terrain that I pre-process within Blender (via python scripts), leaving only the tasks that absolutely must happen at runtime to Unity.
I start off with a cube consisting of 16x16x6 planes.
I then convert this cube into a sphere (as my terrain is spherical).
At runtime; I load each chunk, deform each vertex based on a heightmap, then recalculate the normals.
After doing this, the seams along the chunk edges became painfully obvious. I tried to recalculate the normals manually using the heightmap data instead, but the result was even worse.
I then decided to take a "taped edge" approach, as this seemed to be successful for a few people. I used the same process as above, except I also generated "tape" for each chunk. The tape is designed such that it is two faces wide in each direction, and overlaps the neighboring chunks, something like this:
 CHUNK:
 0000
 0000
 0000
 0000

 TAPE:
 000000
 000000
 00  00
 00  00
 000000
 000000
In Unity, I load the chunk, deform verts, recalculate normals. then I do the same for the chunk's tape. Finally, I find verts from the tape and the chunk edge that match, and use the normals from the tape for the chunk. Here is the relevant code for processing a single chunk:
 for(int v = 0; v < vertices.Length; v++) {
     vertices[v] = vertices[v] * ((heightMap.GetPixelBilinear(uvs[v].x, uvs[v].y).r * intensity) + 1);
 }
 mesh.vertices = vertices;
 mesh.RecalculateNormals();
 Vector3[] normals = mesh.normals;


 // repeat process for the tape
 string tapeName = "Planet_LOD"+lod+".tape."+c.ToString("D3");
 GameObject tape = Instantiate(terrain[lod].transform.FindChild(tapeName).gameObject) as GameObject;
 Mesh tapeMesh = tape.GetComponent<MeshFilter>().mesh;
 Vector3[] tapeVerts = tapeMesh.vertices;
 Vector2[] tapeUVs = tapeMesh.uv;
 for(int v = 0; v < tapeVerts.Length; v++) {
     tapeVerts[v] = tapeVerts[v] * ((heightMap.GetPixelBilinear(tapeUVs[v].x, tapeUVs[v].y).r * intensity) + 1);
 }
 tapeMesh.vertices = tapeVerts;
 tapeMesh.RecalculateNormals();
 Vector3[] tapeNormals = tapeMesh.normals;


 // now find manifold vertices of the main chunk, and copy the normals for the verts that match the tape
 int[] mvIndices = MeshHelper.BuildManifoldVertices(mesh);
 for(int tv = 0; tv < tapeVerts.Length; tv++) {
     for(int i = 0; i < mvIndices.Length; i++) {
         Vector3 sample = vertices[mvIndices[i]];

         float distance = Vector3.Distance(sample, tapeVerts[tv]);
         if(distance < 0.1) {
             // these match, use tape vertex normal
             normals[mvIndices[i]] = tapeNormals[tv];
         }
     }
 }
 mesh.normals = normals;

 // we no longer need the tape.
 GameObject.Destroy(tape);
In this code sample, "mesh" is the mesh of the chunk itself. MeshHelper.BuildManifoldVertices() gets me a list of vertex indices for vertices along the chunk edge. I check for distance instead of an exact match because there are very slight rounding errors between the location of some tape vertices, and the chunk edge. The differences are along the lines of .0001, but I check for 0.1 since that is close enough to find the correct match.
While the result is improved, it is not perfect. The thing I am having trouble understanding is why it is not working in the way it is not working. For some reason, the "north" and "south" edges of chunks are seamless now, but the seams are still present on the "east" and "west" edges of the chunks. Here is an image showing the problem:
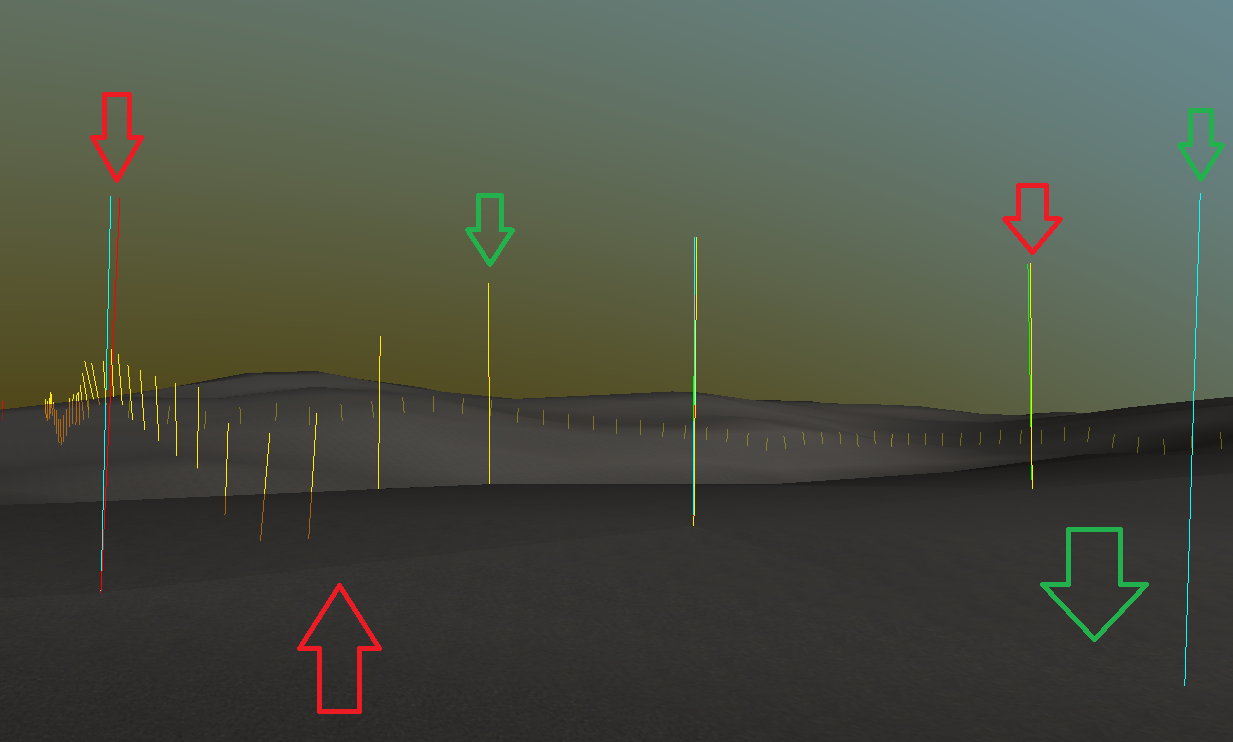
In this image, I have drawn rays for each neighboring chunk's edge normals. You'll notice that red and cyan rays are different, as well as yellow and green. However, cyan and green as well as yellow and red rays are overlapping perfectly. The corner wher they all meet are all in different directions as well.
Here is a bird's eye view showing the issue: 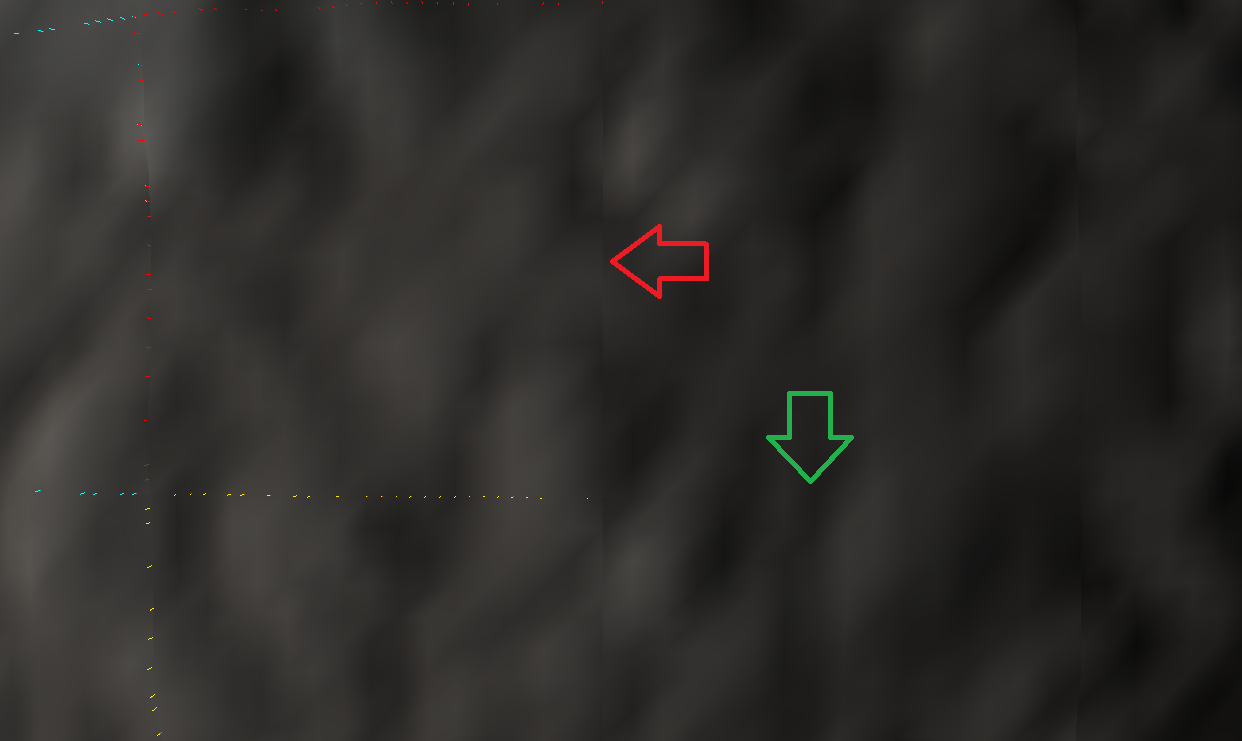
I've been at this for several weeks now, and am reaching a point where I think I need another set of eyes to maybe clue me in on something I may be missing. I know there ae rounding errors, but I don't think they are severe enough to cause this problem, as the edges where the seams went away have slight rounding errors too.
Interestingly, this problem does not manifest in the editor view (at least at a level where I can notice it), but I assume it is because the editor shader is simpler? It makes me wonder if I can resolve this shading issue in my shader instead of dealing with all of these vertices. I am open to any and all suggestions!
EDIT:
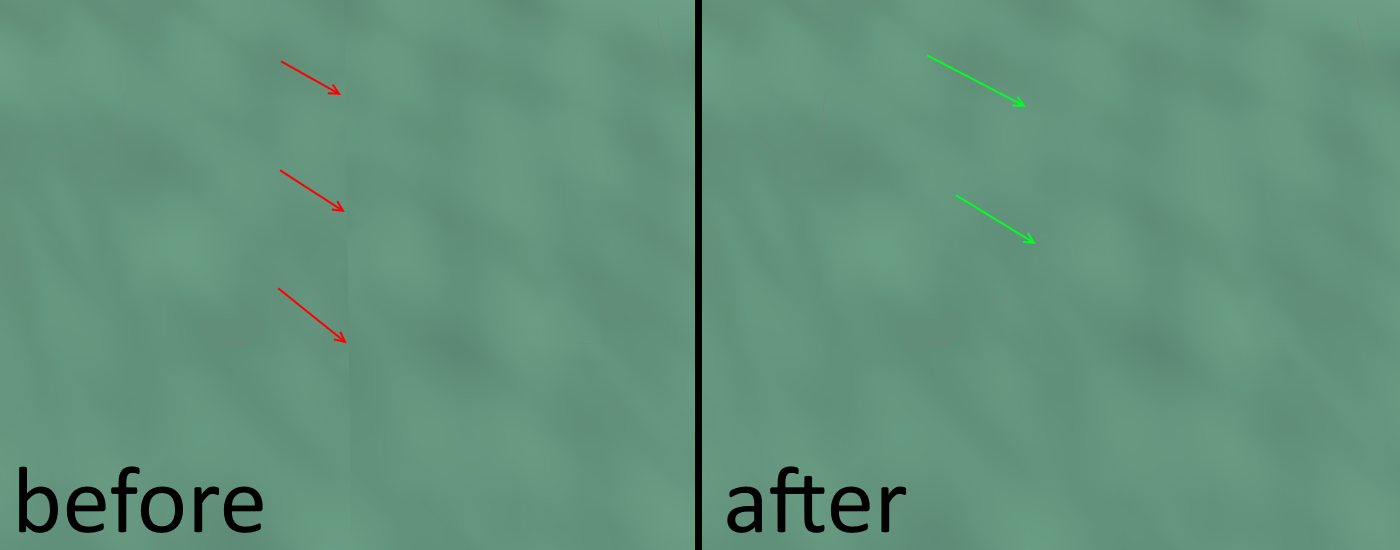
 While I never truly found a way to solve this particular problem, I did manage to make it go away for the most part by changing how I was doing things.

 Instead of generating a heightmap as a texture2D, and then using that to get the vertex elevations; I opted to go directly to the source and use the direct output of the noise module I am using (libnoise) for the elevation info.

 That, combined with the tape approach, seems to have made the seams not nearly as prominent. It leads me to believe that the cause was the way that sampling a texture works; the value you get is simply not always guaranteed to be what you expect. This is usually not important, but when you are relying on the info to be the same so you can correct issues, it becomes a problem.

 I have not marked it as answered as I do not feel I ever found a solution regarding the technique I was using, and also because I still do have some seams (they are just acceptable for now imo). However, maybe this will be beneficial for others who stumble across this via google to read.
I know this is an old question, but me and my team came across the exact same issue and we were able to solve it rather simply.
What we did was to use Unity's RecalculateNormals() method first, and then fix the normals at the edges. For that, after all the chunks were generated, we modified the mesh normals by looping through the edges, taking for each normal the avarage between itself and the neighboring chunk's respective normal. As the mesh was generated by us, we knew exactly the indices that we were looking for.
I hope this helps anyone else with a similar problem.
Just in case anyone is wondering how to modify normals, you first need to copy the entire array, modify it, then reassign:
https://docs.unity3d.com/ScriptReference/$$anonymous$$esh-normals.html
 // copy
 Vector3[] normals = mesh.normals;

 // modify
 normals[i] = new Vector3(x, y, z);

 // reassign
 mesh.normals = normals;
