- Home /
Rotate Center Pivot based Object like a Draw Bridge
Hi, i want to rotate an Object like a Drawbridge. But can't figure out the Math for it.
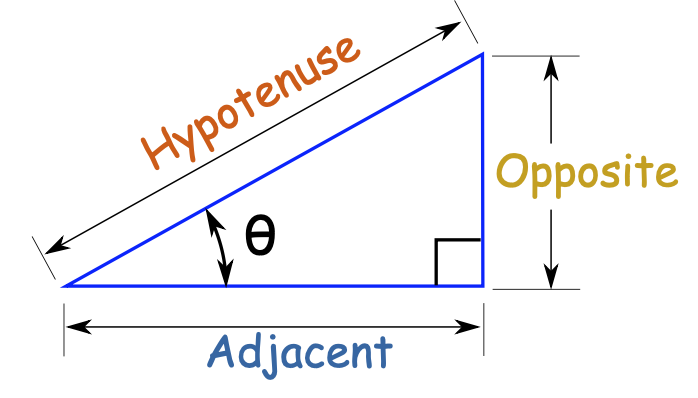
i want to be in control of the Angle float like in the Picture bellow. 
What I know right now is
the target angle for example 20° the Adjacent(X Axis length of my Object)
or the targeting hight like Vector3.Up.(1) (those are pseudo values)
Now if I just rotate the Object around 20° the transform's Position is not where I want it.
so I want the Left Point of the Object always be at a given Point and and the right Point should move up and down.
I can't for example set the Pivot point to left or right because both possabilitys should be open.
hopefully someone has an idea. Thanks in advance Dan
Answer by Ady_M · Jan 01, 2019 at 01:23 PM
Are you mostly interested in the Math or the result?
If you're only interested in being able to rotate an object around a pivot of your choice then creating a parent object and using that as the pivot would be a much easier solution.
EDIT:
I've made an example.

If people really want me to post the code here I will, but it's kind of a lot. Also, for this to work properly you cannot simply copy the code. The code requires a certain object hierarchy and references to be in place. At the bottom of my post you'll find links to the zip file. The project was created in Unity 2018.1.
The solution
Post prefab
The post is an empty gameobject which contains a tall, thin cube that is placed so that the bottom of the cube touches the center of its parent to make it easier to place the posts on a surface.
The post also contains an empty object called "paling Position". It determines where the connected paling will be positioned.
Paling prefab
The paling is an empty object which contains a long, thin cube that is placed so that one end of the cube touches the center of the paling object. The cube is longest on the Z axis (I'll explain why that's important later).
Placing the first post
To place the first post, I simply use Camera.ScreenToWorldPoint and then raycast to find the point in the world that I clicked on. Once I have the point, I instantiate a post and set its position to the raycast point. No position adjustments required because I made sure that the center of the post object is at the bottom of the 3D model (the simple, stretched cube in my case).
Placing another post
Again, I use raycast to determine the position of the click in the world.
This time, I cannot simply create a post at the clicked position because the paling has a fixed size that I should avoid changing (as requested by dan_wipf). The terrain could be very uneven and unpredictable, so I can't solve this with a bit of simple math.
Instead, I chose to solve this problem by doing a series of raycasts in a circular motion. Imagine standing by the last post, lifting the new post up about 80 degrees with your arm stretched and then lowering the post (while keeping your arm stretched) until the post touches the ground. In this case, your arm would be the length of the paling. This way I ensure that the length of the paling can remain unchanged. The distance (on the X and Z axes) between the two posts will of course vary which means that if the fence is placed on a hill, the steeper the hill the closer the posts will be to each other.
As an extra feature, instead of always creating the new post relative to the one created before it, I chose to check which post is closest to the position I clicked: The very first post created or the very last post. All posts between those two have no effect on the placement of the new post. Using two variables of the type Transform, I keep track of the two ends of the fence. Every time I create a new post, I determine whether to overwrite the FirstPost reference or LastPost.
Connecting the posts by a paling
Now I have two posts to work with:
The newly created post and the post closest to the where I clicked (I'll call it the "last post" while explaining).
I instantiate a paling and set its position to the same as the last post. Remember, that the center of the post object is at the foot of its 3D model and the center of the paling is at one end of its 3D model, which means that one end of the paling is touching the bottom of the post.
While the paling is at the foot of the last post, I use paling.transform.LookAt (newPost). I now have two posts connected by a paling at the bottom. When I was creating the paling prefab, the LookAt method is the reason why I specifically chose to stretch the paling's cube along the Z-axis instead of, say, the X-axis :)
The paling is a the foot of the post. I need to raise it, but I don't want to hardcode the height. Therefore, I use Transform.Find() to look inside the last post for an object called "Paling Position" and use that object's localPosition to raise the paling to the correct height. Because all posts have the same height, we now have two posts connected by a paling at the top.
Extra features
An indicator (different colored post) shows the exact position where the post will be placed. It changes color depending on whether the position is valid or not.
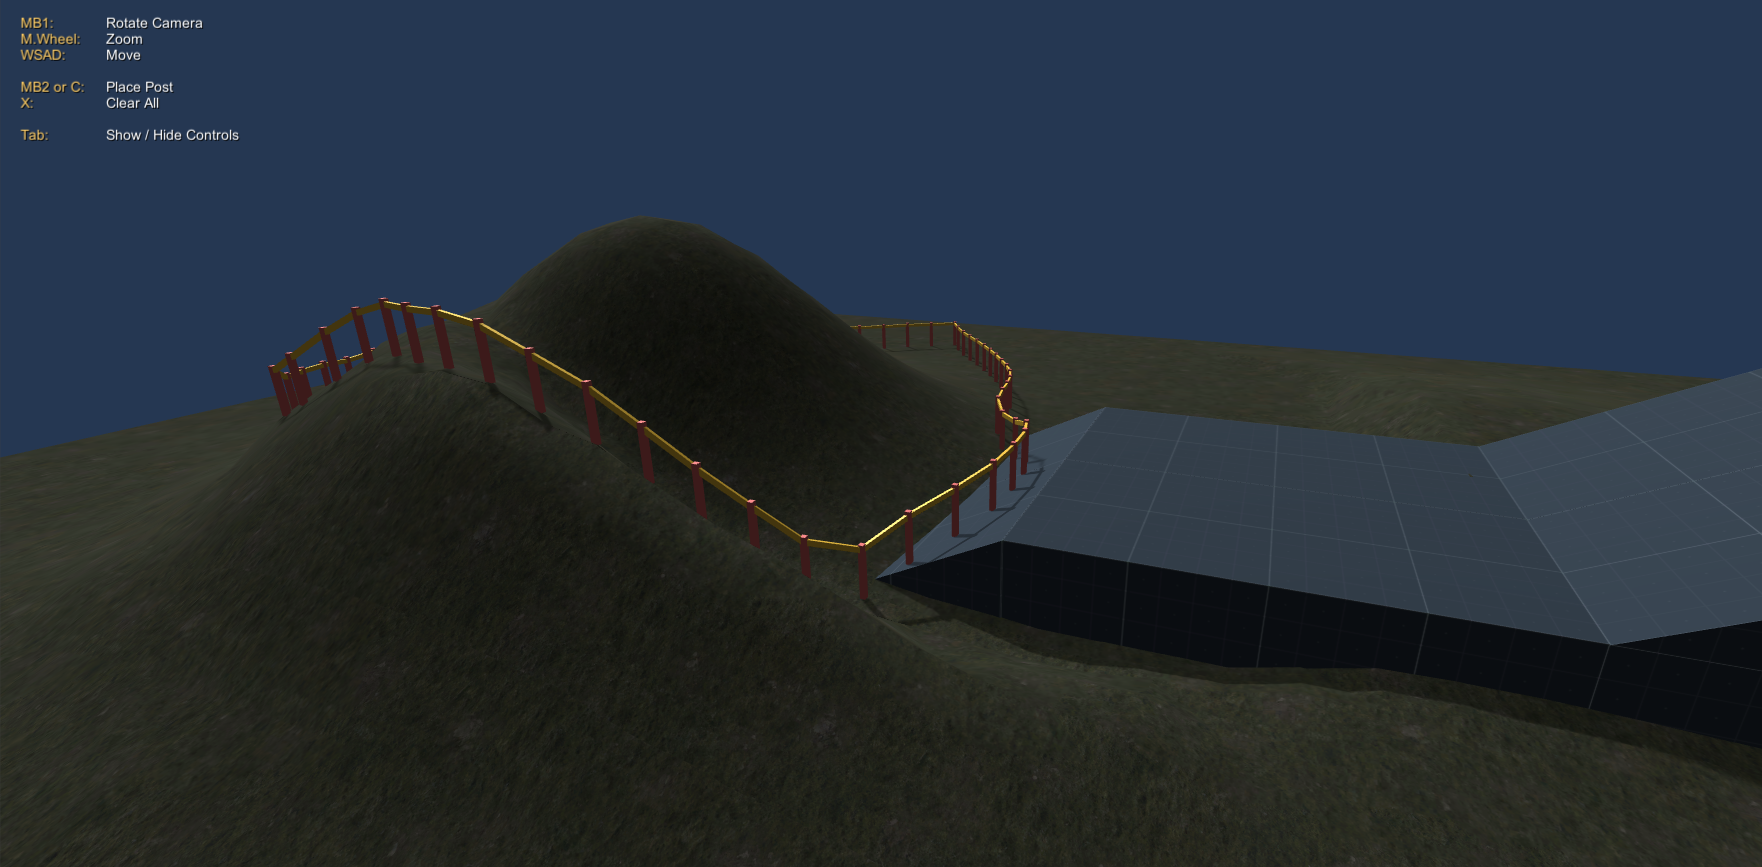
You can control the camera. The controls are displayed on-screen (see the screenshot).
There are public fields available that let you limit how steep you can build the fence.
Download
You can download the project files here. The zip-file contains the "Assets" and "ProjectSettings" folders. No executables. I used Unity v2018.1.
http://adymoussa.dk/Unity/UnityAnswers_Fence_Manager/UnityAnswers_Fence_Manager_v1_AdyM.zip
Just a heads up: I use an unorthodox naming convention which is explained at the top of the scripts.
Agreed and this is how'd I'd do it based on simplicity , however the bridge needs to pivot at both ends
I can't for example set the Pivot point to left or right because both possabilitys should be open.
well what i want to achieve is a fence system. i took the bridgr for an example of how i’d like to rotate the object.
so basicly i spawn twi fence posts and then add a paling between, the paling should then set the distance between the posts. the paling is not scale able(fixed length) , so for your question yes i guess i need some maths :)
How will you be rotating this object? Are there any rigidbodies involved?
If you want to avoid clipping into other objects, then I would use the parent method, meaning that the parent (pivot) needs to have the Rigidbody and use Rigidbody.angularVelocity / addTorque to rotate. To switch pivot positions, I guess you could restructure the hierarchy using code (by manipulating transform.parent) and move the objects according to the change of pivot. The pivot positions won't be changing very often, will they? If the object looks the same on both ends and from both sides then while using the parent method you could simply rotate the whole object instantly (e.g. on the Y axis if you're making a 3D game) when you need to switch pivot positions and then shift it over so you can't tell that it happened.
If clipping is not an issue then I would use Transform.RotateAround() as @Tobychappell suggested :)
For some reason, I thought there would be a gradual rotation (the bridge example threw me off). It's an instant rotation as soon as the fence is spawned?
For your Questions.
There are no Rigidbodies involved.
Rotation is based on the vector3.z position / difference of the Fence Post
Clipping does not matter. because of it's going to be treated as a single Object.
Well Transform Rotate around would work for the Rotation, but I still need then to calculate where the end position of the Pailing is, to fluently go on
I found out how to calculate the distance with the Pythagoras theorem (see picture below)
this is in code:
 //???(Pythagoras) = √( (negative)-length pailing²+height pailing²)

 Pyth_A = $$anonymous$$athf.Sqrt(-(Pyth_B * Pyth_B) + (Pyth_C * Pyth_C));

 //Pyth_A represents ???(Pythagoras)
well right now I need to figure out how to make a proper calculation of how the objects should move so they're always left sided and not centered I guess. Happy for any Input and thankful for all the advices so far!
Answer by Tobychappell · Jan 01, 2019 at 12:59 PM
Bear in mind that as you rotate the bridge from one side the other side won't go vertically upwards, it will move in an arc.
What you can do is have 2 transforms on either side (or two positions calculated from the bridge's transform) and use bridgeTransform.RotateAround() : https://docs.unity3d.com/ScriptReference/Transform.RotateAround.html
thanks, but might have a look on my comment Ady_$$anonymous$$
Your answer

