How can I instantiate button like this?
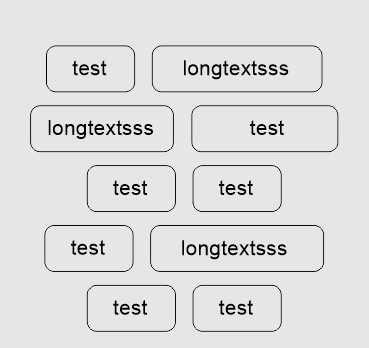
So my question is how to instantiate the UI button like image shown. I've succeed with the instantiation and insert text from the array, but I didn't know how to organize the ui. Any suggestion?
 So, I just got it worked. It's not easy to answer because I didn't explain the whole thing. But @Hellium helped me a little bit. Thank you btw.
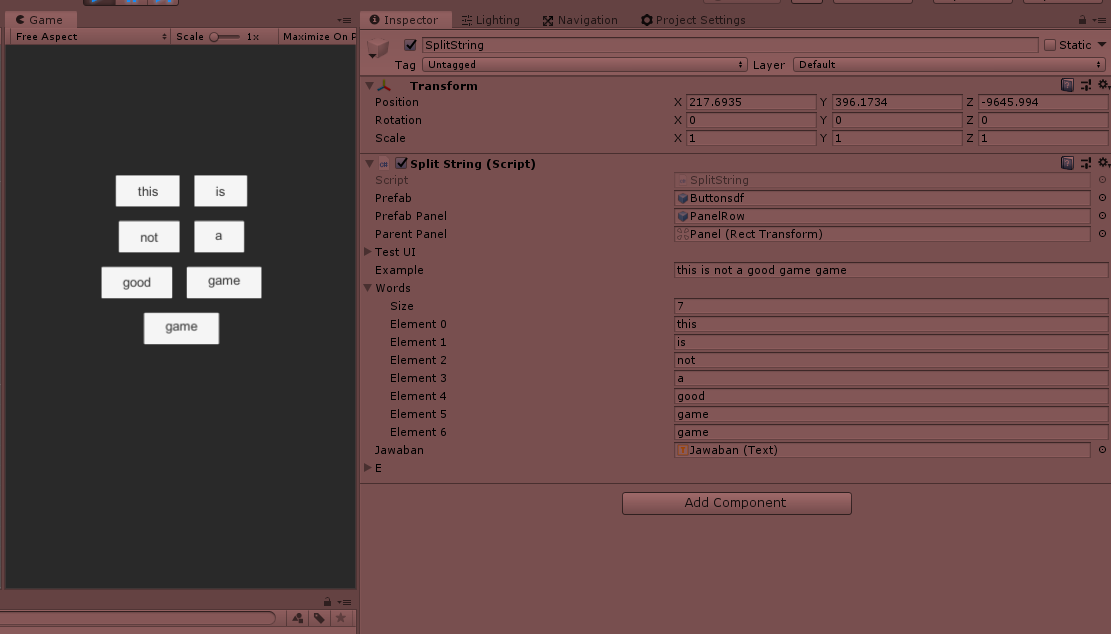
So first I create the line using for each loop to instantiate the row "Line". Inside the the for each I made another for each loop to instantiate the button. if the array has odd number length will have an exception on the loop.
I add horizontal layout group and content size filter on the row "Line", vertical layout group and content size filter on the main panel and the prefab button.
  Panel GameObject
  [VerticalLayoutGroup] : ControlChildSize.Width = true & ChildForceExpand.Width = true
     ├ Line1 GameObject
     │ [HorizontalLayoutGroup] : ChildForceExpand.Height = true
     │     ├ TextBorder1 GameObject
     │     │ [HorizontalLayoutGroup] : Padding = (20, 20, 10, 10) // adjust as you want
     │     │ [ContentSizeFitter] : HorizontalFit = Preferred & VerticalFit = Preferred
     │     │     ├ Text GameObject
     │     │     │ [ContentSizeFitter] : HorizontalFit = Preferred & VerticalFit = Preferred
     │     ├ TextBorder2 GameObject // Same as TextBorder1
     ▒     ▒
     │     ├ TextBorder3 GameObject // Same as TextBorder1
     ├ Line2 GameObject // Same as Line1
     ▒
I'm sorry, I didn't understand the Line1 & Line2. Is that the row? so I set it up one by one?
Yes, they are the rows you have to create one by one. With the existing Unity's component, I believe it's the only way to do what you want.
I believe you can write your own CustomLayoutGroup if you don't want to manually create the lines :
https://forum.unity.com/threads/how-to-write-a-custom-layout.383949/
