Small line appears on tilebased terrain
We are creating our maps using tiles and everything works fine, however sometimes when moving some lines will appear where the tiles meet.

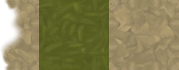
This happens because the edge tile on the top is a little bit higher (0.005) than the grass tile below it. For reference, below are the tiles in this scene:
Is there any way to fix this? Hopefully some other way other than combining meshes, i'd prefer to keep everything in it's own mesh.
Thanks a lot! I appreciate your time
Although I don't really understand the connection between your first and second image, this looks like a simple wraparound problem. Unless you need the textures to be repeatable, have you tried setting the WrapMode of your textures to "Clamp"?
Also, it is not clear what you mean by "is a little bit higher (0.005) than the grass tile below it". You mean physical/terrain height and there are actually several tile layers on top of each other? Why do you need it to be higher? Or do you mean width/height dimension and your tile is strechted a bit?
EDIT:
One solution would be of course to place the sand-tile also 0.005 higher. But this "solution" only fixes the symptom you have. It would be better to fix the actual problem, which is the 0.005 shift, and the z-fighting if there is no shift.
A better solution would be a custom shader for your alpha-channeled sand rim. First, don't do the 0.005 shift. Use a shader with "Offset 0,-1" or "Offset -1,-1" set (maybe experiment a bit which will give you the best results). You can also try to increase the render queue of the shader (could also be done by script via renderer.material.renderQueue+=1;). If you are certain that these rims will only cover other co-planar layers below (such as the grass), you can also experiment with "ZTest Always", but note that in this case if you want to place any objects above that rim, they'll probably need an even higher renderQueue, so this will get more complicated.
See also here: http://docs.unity3d.com/Documentation/Components/SL-CullAndDepth.html
Sorry if I wasn't clear. Where you see the edge of the dirt (above the green line) there are two planes ontop of each other, seperated by .005 (this is because if I don't do this the two planes render in weird ways).
The second image represents three different "planes". A combination of these are what you see in the first image. I hope this makes things clearer. Thanks for the response
O$$anonymous$$, in that case, switching between repeat/clamp won't help you. I edited my answer with another alternative.
I'm still looking into shader coding but I'm pretty sure this is what I'm looking for!
I found this video very helpful. https://www.youtube.com/watch?v=f7zD$$anonymous$$lsyu6s
Thanks so much Wolfram
Nice tutorial, didn't know somebody made this. And it perfectly fits your problem (and the suggestions in my answer - although he explains it better ;-) ). Thanks for the link.
Note you don't have to (re-)write any shaders from scratch. For the builtin shaders, you can download their source from the Unity page (Support->Resources->Assets), then find your shader, copy it into your project, and rename it in the shader source (the filenmae is irrelevant). For example, the file containing the "Transparent/Diffuse" shader is called "Alpha-Diffuse.shader".
